Here are some notes on getting high refresh rates under Windows and Linux. For the experiments where I cared about fast timing, I usually also cared about contrast resolution, so this mainly assumes I was also using the DATAPixx. I don’t think that’s important though.
Getting high refresh rates
Persuading the PC to run at 160Hz in Linux
For one experiment, I wanted to use the high refresh rate (160Hz) allowed by my CRT monitor at low spatial resolution (800×600). Initially, couldn’t get this in Windows 7 (but see below). In Linux, I managed to get 160Hz going when the CRT was connected directly to the graphics card (see my notes on that), but I had problems when the same monitor was connected via the DATAPixx, as in the diagram above. I was using this /etc/X11/xorg.conf file, with modelines requesting 800×600@160Hz for the DATAPixx.
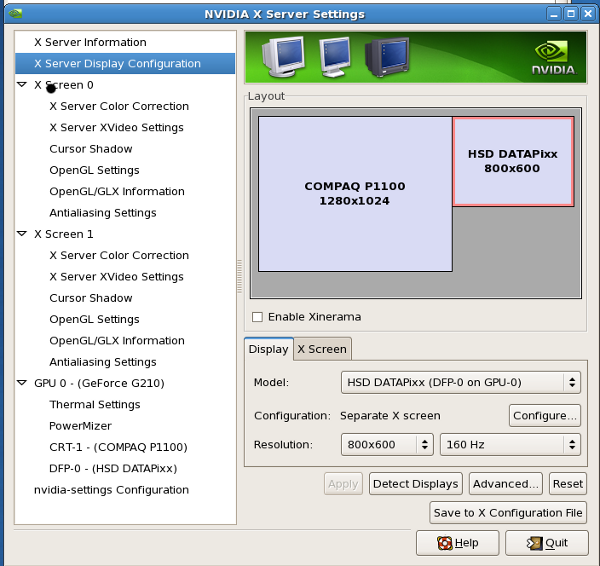
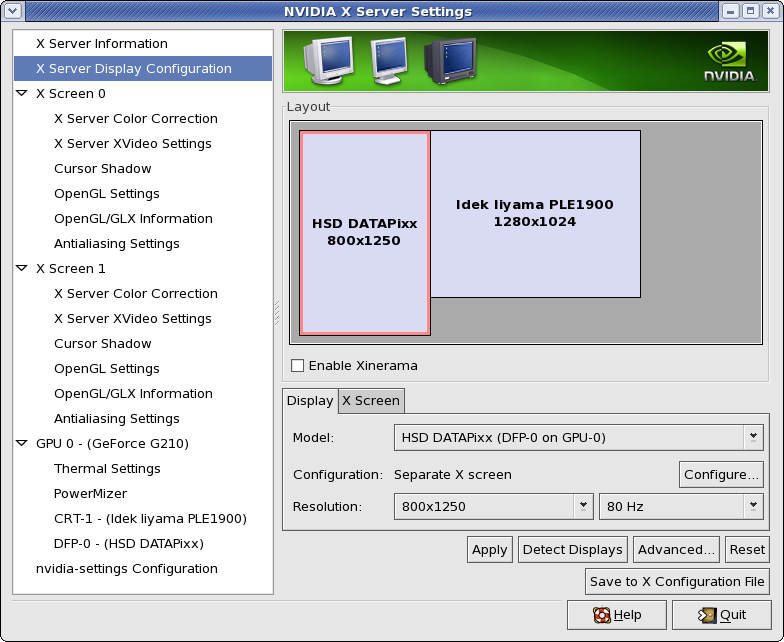
When I looked at the display using the nvidia-settings utility, everything looked OK:
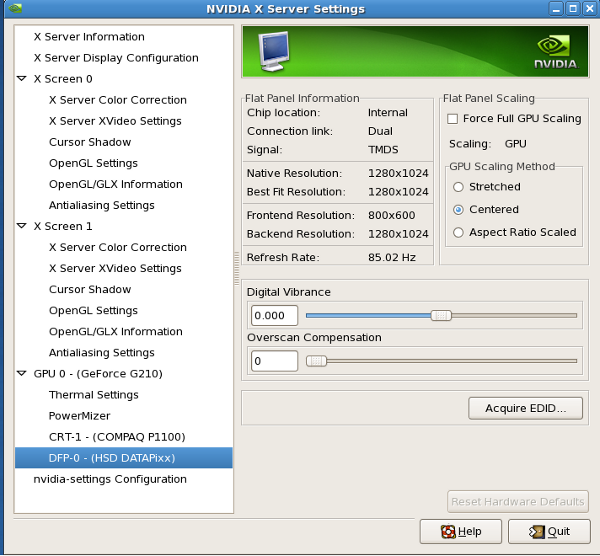
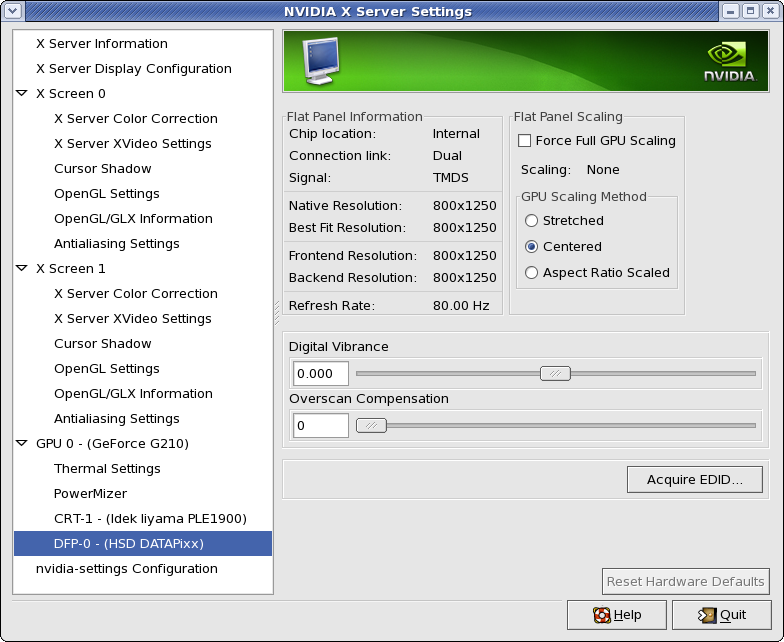
But it wasn’t. Really, the graphics card was ignoring my requested mode, because it believed the DATAPixx was a Digital Flat Panel which was only capable of displaying 1280×1024@85Hz:
Sure enough, when I measured the refresh rate with a photodiode, it was 85Hz – not 160Hz. I tried various ways round this, e.g. setting “useEDID = 0” in the xorg.conf file in the hope I could stop the system reading the DATAPixx’s inbuilt EDID and instead force it to use the modes I handwrote into the xorg.conf file. That didn’t work. I contacted VPixx and very quickly they had solved the problem for me. Using their dpxutil utility, I was able to rewrite the DATAPixx’s own EDID file with the resolutions I wanted. To do this, I boot up in Windows, run dpxutil.exe, and enter the command “edid”. This asks you to enter two modes; for example I entered “800 600 160” and “1024 768 145”, both of which are supported by my Compaq P1210 monitor. Then I turned the DATAPixx off and on again, and booted to Linux. Now, things look OK:
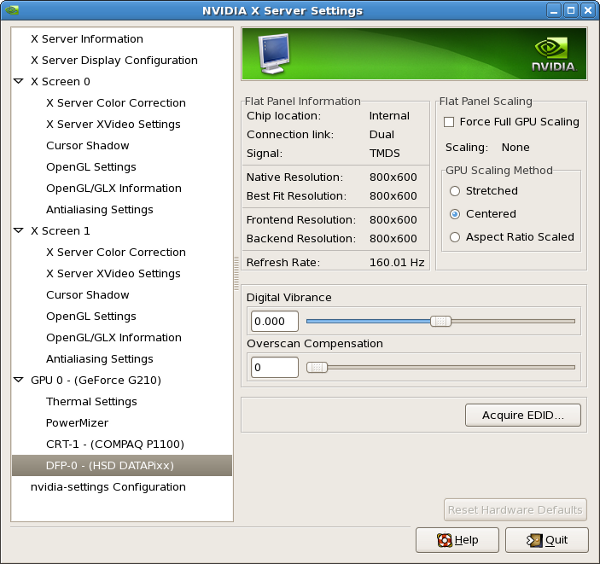
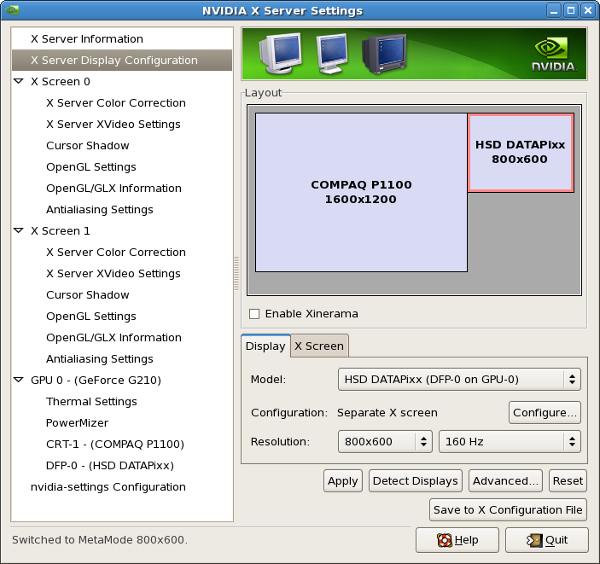 but this time they really are OK:
My photodiode confirms the 160Hz refresh rate.
Persuading the PC to run at 160Hz in Windows 7
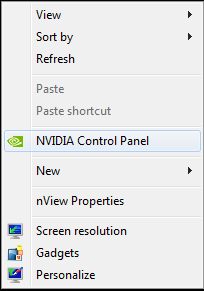
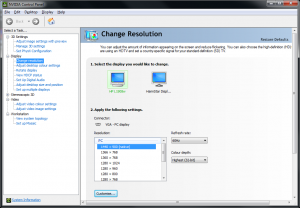
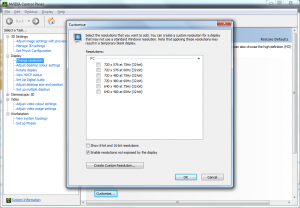
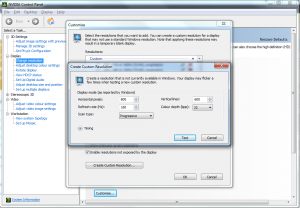
Since then, I’ve found that you can get 160Hz in Windows 7 very easily. I was using an NVidia Quadro 680 graphics card and a Mitsubishi Diamond Pro 4065u driven via the DATAPixx. Opened up the NVidia controller, and it has an option “Add custom mode”. I simply added 800 x 600 @ 160Hz, hit “Apply” and it all worked. Easy as that. Will run my drifting Gabor stimulus dropping about 20 frames out of 30,000. And certainly beats the agony that is Linux.
The pictures below are pretty much a step-by-step guide. Click on them for a full-size version.
Running at 160Hz without dropping frames
Of course, a 160Hz refresh rate brings its own problems. With my NVidia GeForce G210, running at 800×600@160Hz, the graphics card could run simple stimuli OK. E.g., testing some PTB demo functions: ProceduralGaborDemo reports no dropped frames and an average framerate of 159.99Hz. DriftDemo6 reports 2 dropped frames out of 9601. SpriteDemo, ExpandingRingsDemo, DotDemo report no dropped frames; ContrastModulatedNoiseTheElegantStyleDemo reports 26/1020 dropped frames. Reducing the resolution doesn’t seem to help: at 640×480@160Hz, ContrastModulatedNoiseTheElegantStyleDemo reports 30/844 dropped frames. My actual stimuli do result in quite a lot of dropped frames. So, basically, the graphics card can do 800×600@160Hz provided the stimulus is simple enough, but gets left behind with more complex stimuli. Here are some hints, mainly from Mario Kleiner, on how to help:
- Most obviously, quit everything except Matlab when running experiments. Using Linux helps as there are no virus scanners.
- UsePsychImaging(‘RestrictProcessingToROI’, w, ‘FinalFormatting’, stimRect);to tell PTB not to bother processing the stimulus except within stimRect.
- Make sure there are no shiny desktop effects on the second monirot, e.g. compiz aka shiny half-transparent windows with soft shadows and other bling; usually enabled on Ubuntu by default.
- Run matlab -nojvm to get rid of Matlab background activity. (i.e. “matlab -glnx86 -nojvm” in Linux). This doesn’t work for me on R2009b, annoyingly; Matlab will not fire up in nojvm mode.
- Make sure you are using maximum Priority, most easily by running as root on a Linux system.
- Use a real-time Linux kernel: “On Ubuntu you’d simply type this (and your password): “sudo apt-get install linux-rt” …then wait about 5 minutes for the installation to complete, reboot and then enjoy a realtime operating system that does many things drastically better than Windows or MacOS/X timing-wise.” Unfortunately I don’t know how to do this on CentOS.
- Use the RESPONSEPixx to collect subject responses during the stimulus presentation, avoiding load on the PC (see below).
- Use ProceduralGabors and alpha-blending to minimise the number of textures you need to create.
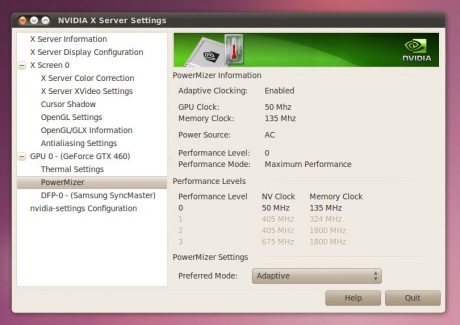
- Set the nvidia PowerMizer settings to “Prefer maximum performance” as in the screenshot below. Unfortunately I don’t know how to save these settings; it defaults back to “Adaptive” every time I restart the X desktop.
Using vertical video stereo mode – a trick to double the frame rate
Peter April drew my attention to another cool feature of the DATAPixx. I used the dpxutil to update the EDID with two modes: the 800×600@160Hz I actually wanted, and another at 800×1250@80Hz. (Peter says choose a number 50 pixels or so larger than twice the height you want.) Turned the DATAPixx off and on again, used the gtf utility to get an appropriate modeline, and updated the /etc/X11/xorg.conf file.
There was a problem with this initial attempt, because it resulted in a total vertical number of lines which was odd, so that successive frames differed by 1 in the number of lines (i.e. 655 and 655 lines in alternate frames). This is apparently taken by CRTs as a signal to do interlacing, so both my frames were (I think) displayed at once, on alternate lines.
With Peter’s help, I therefore changed to 800×1249@80Hz. The DATAPixx status was now:
>> status=Datapixx(‘GetVideoStatus’)
status =
horizontalResolution: 800
verticalResolution: 1249
horizontalTotal: 1104
verticalTotal: 1308
verticalFrequency: 80.0019
horizontalFrequency: 1.0464e+05
dotFrequency: 1.1553e+08
mode: 2
receivingVideo: 1
receivingDualLinkVideo: 0
horizontalSplit: 0
verticalStereo: 1
horizontalOverlay: 0
horizontalOverlayBoundsLeft: 0
horizontalOverlayBoundsRight: 0
horizontalOverlayBoundsTop: 0
horizontalOverlayBoundsBottom: 0
pixelSyncTimeout: 0
overClocked: 0
pixelSyncRasterLine: 0
pixelSyncSingleLine: 1
pixelSyncBlankLine: 1
The PC is supplying an image of 800×1249 to the DATAPixx at 80Hz, and the DATAPixx is dividing the image in two and presenting it at twice the frame-rate. My photodiode and oscilloscope confirm I am getting a 160Hz refresh rate, hurrah. The DATAPixx is dividing the image at verticalTotal/2, i.e. here 654.
Now, let’s test it out. I open a window using PsychImaging as described above, so 0=black and 1=white. I fill the whole screen with white and do:
Screen(‘FillRect’,w,0,[0 0 200 200]);
Screen(‘FillRect’,w,0,[100 YOFFSET+0 300 YOFFSET+200]);
Screen(‘Flip’,w);
with YOFFSET=654. This results in two gray rectangles which are black where they overlap. The DATAPixx is displaying the two frames in alternation, so the black rectangles appear grey where they are being alternated with the white screen. Thus note that the above code fragment, at 80Hz in verticalStereo mode, is NOT equivalent to
Screen(‘FillRect’,w,0,[0 0 200 200]);
Screen(‘Flip’,w);
Screen(‘FillRect’,w,0,[100 0 300 200]);
Screen(‘Flip’,w);
at 160Hz in ~verticalStereo mode. The latter presents a black rectangle at x=0, then erases it 6.25ms later and replaces it with a black rectangle at x=100, and only the second rectangle then gets redrawn every subsequent 6.25ms. The former presents a black rectangle at x=0, erases it 6.25ms later and replaces it with a black rectangle at x=100, then erases that one 6.25ms and replaces it with the first rectangle, so that both rectangles get redrawn in alternation. So if you want to use this mode as a trick to double the effective frame-rate, you will have to write your code very carefully to bear this in mind.


